
If you’ve been in fear that you’ll never catch up on bookkeeping you’ve avoided all year, and that tax deadline has you sweating: take a deep breath.
You can get caught up quickly (and cleanly) without buying new software or spending your weekend hunched over receipts.
In this step-by-step guide, I’ll show you how to perform “catch up bookkeeping” just in time for tax season.
You’ll learn how to build a complete, tax-ready Profit & Loss (P&L) for your business using a simple spreadsheet workflow that your tax preparer will love.
You’ll learn exactly how to pull relevant financial records like your bank data. Then we’ll organize it into a P&L, reconcile cash, and run a few sanity checks so what you hand off is accurate and audit-ready.
I’ll also share an easy routine to keep you from falling behind next year.
Monitoring your business’s financial health is key to know when it’s time to graduate from a spreadsheet to full accounting software.
Catch Up Bookkeeping Quick Links (Save These)
- Open a business banking account that makes bookkeeping easier (exclusive deal).
- Grab my ready-to-use Profit & Loss Spreadsheet (with dashboards & checks).
- Compare bookkeeping software & get discounts (if you’re ready to upgrade).
- Learn more about money routines (Money Monday). Or search my channel for “Money Monday”
Who This DIY Catch Up Bookkeeping Method Is (and Isn’t) For
Perfect for you if:
- You’re a sole proprietor or single-member LLC filing a Schedule C.
- You have ≤ ~100 transactions per month (bank + credit card combined).
- You don’t need a balance sheet to file (no inventory, fixed assets, or formal debt schedules to track in detail).
- You want a clean, accurate P&L by month and year-to-date, fast.
Business owners should consider software instead if:
- You operate as an S-Corp or C-Corp and need full Balance Sheet reporting.
- You hold inventory, significant fixed assets, or multiple loans.
- You’ve outgrown manual categorizing and need automations, bank rules, multi-user access, and advanced reporting.
If you’re on the fence, you can still use this spreadsheet to catch up the current year—and then start fresh in software for the new year. (I’ll show you how to decide later.)
The “One-Hour Catch-Up Bookkeeping” Roadmap
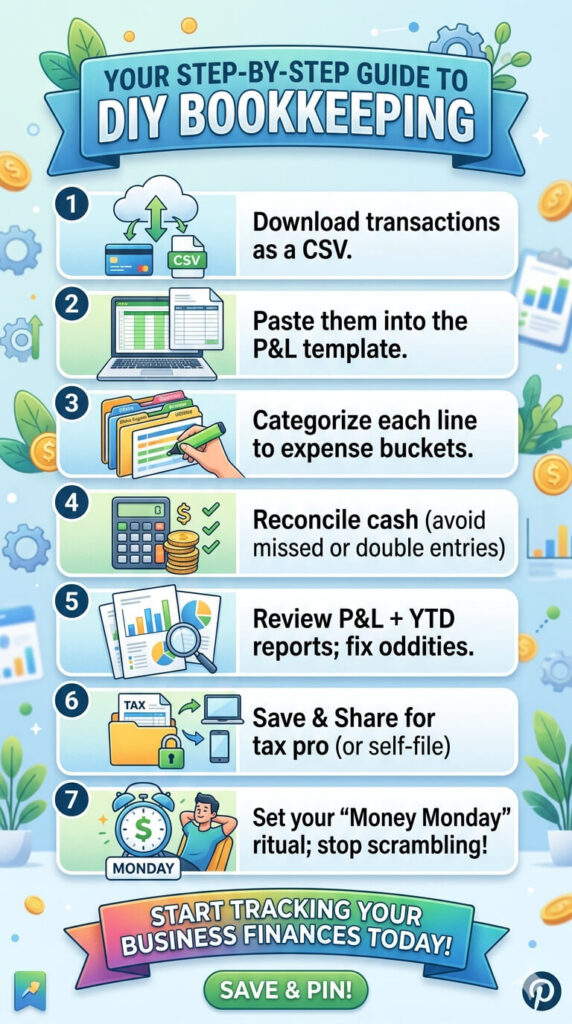
- Download your bank/credit card transactions (CSV).
- Paste them into the P&L template (date, description, amount).
- Categorize each line to IRS-friendly expense buckets.
- Reconcile cash so you know you didn’t miss or double-count anything.
- Review reports (Month P&L + YTD) and fix oddities.
- Save/Share neatly for your tax pro (or use to self-file).
- Set your “Money Monday” ritual so you never scramble again.
Step 1: Get Your Transactions (the Right Way)
Why CSV > PDF: A CSV file opens in Excel/Google Sheets and lets you copy/paste columns directly. This gives you accurate financial records, no retyping.
From your bank/credit card portal:
- Choose CSV format.
- Export all months you need—January through current month.
- Include date, description/payee, and amount columns.
Pro tip: If you’re using a dedicated business bank (huge time saver), most of your charges will already be “business.” If you’ve been using a mixed personal account, you’ll need to skip personal lines as you go.
Make this easier next year: Open a no-fee business banking account with frictionless exports and multiple sub-accounts for taxes, payroll, profit, etc. I use Relay (exclusive community deal) because it’s built for small-business cash control and makes bookkeeping smoother.
Step 2: Drop Everything into the P&L Template
Open your Profit & Loss Spreadsheet
(mine includes monthly tabs, Year-to-Date rollups, dashboards, and a cash reconciliation helper).
- Go to January (or your first month).
- Paste Date into the Date column (Paste Special → Values so you keep formatting clean).
- Paste Description/Payee into the Description column.
- Paste Amount into the Amount column.
Check the signs (super important):
- Income should be positive.
- Expenses should be negative.
Different banks structure CSVs differently. If yours shows all positives, add minus signs to outgoing charges for accuracy.
Do this now, not later. Repeat for each month.
You can fully complete January, then duplicate your flow for February, and so on.
Once you’ve done a month or two, you’ll fly.
Step 3: Customize Your Categories (Once)
Before categorizing, open the Chart of Accounts tab in the template:
- Add/edit Expense categories you actually use.
- Keep names IRS-friendly (e.g., Advertising, Software, Office Supplies, Meals, Travel).
- Add revenue buckets if you want separate product/service lines.
Add your Account Names too (e.g., “Relay Checking,” “Chase Ink Card”). This helps during cash reconciliation and makes your work paper-quality.
Step 4: Categorize Transactions Quickly (and Accurately)
Now go line by line and choose a category from the dropdown. You’re essentially building the subtotal sections of your P&L.
Financial management speed hacks:
- Sort by Description so you can categorize multiple identical vendors in a row.
- Use copy-down to repeat a category for a block of similar charges.
- For income, use consistent labels (e.g., “Course Sales,” “1:1 Services,” “Affiliate Income”).
What about personal charges you want to deduct?
If you paid a legitimate business expense from a personal account (it happens), just insert a line on the correct month, choose the correct category, and set the Account field to something like “Personal Reimbursable” so you won’t include it in the cash reconciliation for your business bank.
Meals & entertainment rules:
Stay conservative; log only 50% deductible meals under “Meals (50% deductible)” and keep client/business purpose in your receipt storage.
Step 5: Reconcile Cash (The Sanity Check That Saves You)
A P&L is only as good as what you captured. The Cash Reconciliation tab confirms that you:
- Didn’t miss bank lines, and
- Didn’t double count anything.
How to do it:
- Enter your beginning cash at 1/1 (from last year’s ending bank statement).
- Enter your ending cash at period end (latest bank statement).
- The sheet compares the movement in your P&L to the change in bank cash.

If you’re off, look for:
- A month where you forgot to paste transactions (it happens!).
- A duplicate paste (same statement loaded twice).
- A sign error (positive vs negative).
- Cash-only purchases never recorded (insert a line to capture them).
When the difference is $0, you’ve got strong assurance your P&L reflects reality.
Step 6: Review Your P&L Like a Pro
Go to the Year-to-Date P&L:
- Do the revenue totals make sense for your year?
- Any expenses unusually high/low?
- Look for negative expense lines (often refunds mis-categorized as expense instead of income).
- If you break out income categories, confirm the mix aligns with your offers.
Then flip through each Monthly P&L:
- Are spikes explained (launches, travel, equipment)?
- Are subscriptions consistent month to month?
- Did you include all months? (missing February is a common oversight)
Step 7: Use Dashboards to Spot Insights (and Errors)
If you’re using my template, you’ll see this financial data at a glance:
- Revenue by Month (seasonality)
- Operating Expenses by Month (overspending flags)
- Top 5 Expenses YTD (prioritize cost control)
- Profit by Month & by Quarter (cash planning and tax estimates)
If the visuals don’t match your gut feel of the year, there’s likely a categorization or missing-line issue—better to catch it now.
Step 8: Package It for Taxes (and Your Future Self)
Create a simple “Tax Pack” PDF for your preparer (or for your files if you DIY):
- Year-to-Date P&L (summary)
- Monthly P&L (supporting detail, if they want it)
- Cash Reconciliation page ($0 difference)
- A short Notes section: unusual items, purchases over $2,500, owner draws, PPP/ERC notes (if any), mileage total, home office details, etc.
Store the spreadsheet file and the PDF pack together in a cloud folder labeled “Tax Year 2025” (or current year) with receipts accessible.
A Simple Routine to Stay Caught Up: “Money Monday”
This is how I keep my books current in minutes instead of a marathon catch up process:
Every Monday (15–25 minutes):
- Pull the last week’s bank/credit card CSV (or use software feeds if you’ve upgraded).
- Paste into the current month tab; categorize new items.
- Attach any key receipts (store digitally).
- Skim the Month P&L for weird spikes.
- Move cash into Tax/Profit/Owner Pay sub-accounts (Relay makes this easy with rules).
Consistency beats intensity. A 20-minute date with your numbers keeps everything light, accurate, and stress-free.
When It’s Time to Upgrade Beyond Spreadsheets
Spreadsheets are incredible for catch up work and for simpler businesses. But if you’ve reached one or more of these milestones, consider switching to software for the new year:
- You’re an S-Corp/C-Corp and must file a Balance Sheet
- You have inventory or depreciable fixed assets.
- You’ve crossed ~100–150 transactions per month.
- You need bank rules, multi-user access, invoicing, or A/P automations.
- You are managing cash flow forecasting, tracking categories, or department/offer P&L.
Start here to compare leading options (and get the best discounts I’ve negotiated).
Frequently Asked Questions
Q: I mixed personal and business spending on one card. Can I still use this?
Yes. Paste your full CSV, then skip personal transactions. For any business expense paid personally, add a line for that expense and set the Account to “Personal Reimbursable” (so it doesn’t affect your business cash reconciliation). Going forward, separate banking will save you tons of time—jamietrull.com/relay can help you open dedicated accounts quickly.
Q: What if I can’t get my bank CSV—only PDFs?
Most banks offer CSV somewhere in the statements or transactions page. If not, you can:
- Use a PDF-to-CSV converter (carefully check results), or
- Manually key just the date/description/amount columns (start with the largest months first to capture 80–90% quickly).
Q: How do I handle refunds, returns, and chargebacks?
Enter them as positive amounts to an income line like “Refunds/Adjustments,” or reduce the original expense category if it’s truly reversing a charge. Avoid leaving negative expenses unless you’re intentionally netting an account for clarity.
Q: Do I need to track mileage or home office in this sheet?
You can add supporting schedules for mileage (total business miles × IRS rate) and home office (simplified method or actual expenses). Keep your calculations with your Tax Pack PDF.
Q: I have a loan. Can I still use this?
Yes—interest belongs in your P&L (Interest Expense). The principal portion is a balance sheet item; if you’re filing a Schedule C only, you don’t need to show the principal reduction on the P&L. Keep a simple amortization schedule with your Tax Pack.
Common Mistakes (and Easy Fixes)
Mistake #1: All amounts positive
Result: Profit is way too high.
Fix: Make expenses negative. Income stays positive.
Mistake #2: Doubling a month
Result: Crazy spending spike.
Fix: Sort by date/amount, delete the duplicate block.
Mistake #3: Mixing months in the wrong tabs
Fix: Paste each statement’s lines into the correct month. The YTD view will roll up automatically.
Mistake #4: Refunds logged as expenses
Fix: Recode to an income line (Refunds/Adjustments) or reverse the original expense.
Mistake #5: Cash doesn’t reconcile
Fix: Use the Cash Reconciliation tab—confirm you didn’t miss a month, duplicate a paste, or flip a sign. Aim for $0 difference before calling it done.
A Word on Profit (and Paying Yourself)
Clean books do more than get your taxes filed. They help you pay yourself confidently.
If you’ve struggled to build consistent owner pay or profit, consider adopting a multiple-account system (Taxes, Profit, Owner Pay, Opex). With Relay, opening and automating those sub-accounts is easy, and it nudges you to keep profit first, not as an afterthought.
Your Next Three Steps
- Download your bank/credit card CSVs for the year.
- Grab the Profit & Loss Spreadsheet and catch up month by month: jamietrull.com/profitloss
- Block a weekly Money Monday (15–25 min) so you never scramble again.
If, after catching up, you’re ready for automations and richer reporting, compare and claim deals on the best accounting tools for small businesses.
You’ve got this! A clear, accurate P&L is the first step to better decisions, less stress, and more profit.
Sponsor & Affiliate Disclaimer: Some links above are partner or affiliate links, which may provide me with a commission or bonus at no additional cost to you. I only recommend tools I use personally or genuinely believe will help small business owners. This article is for educational purposes only and is not tax, legal, or accounting advice. Please consult your own advisor for guidance specific to your situation.
This transcript was generated from the video for your convenience, but it may contain typos or slight errors due to the transcription process. For the most accurate and complete information, we recommend watching the full YouTube video.
Catch Up Bookkeeping Transcript:
Catch Up on Bookkeeping Before Tax Time
If you’ve been avoiding your bookkeeping all year and are slightly panicking right now, don’t worry, I’ve got you with that tax deadline approaching.
It is time to go ahead and face it head on, but thankfully, I have got a way to help you get your books together in less than an hour for the entire year, and I’m gonna show you how to do it with a simple spreadsheet that your tax preparer will love you for.
Hi everyone. I’m Jamie Trull. For those who don’t know me, I am a CPA financial educator and now author of the book, Hidden Profit.
And today I’m gonna show you a simple, stress-free way to get your books caught up, whether you’re catching up for a month or all the way back to January 1st.
Now, if you’re new here, or even if you’re not, make sure that you’ve hit that subscribe button because on this channel I’m bringing you all the information to help you stay informed, organized, and profitable.
In your business finances and stick around because at the end of the video I’m gonna tell you how to actually create a system that you can stick to each and every month so that you don’t have to scramble next year.
When a Spreadsheet Works for Business Bookkeeping
So in just a minute, I’m gonna jump into my spreadsheet and show you how you can quickly set up and create a profit and loss statement for your business.
But before I do that, I wanna go ahead and clarify what types of businesses might actually need to use something a little bit more than a spreadsheet for their finances.
So a spreadsheet is great for simpler businesses if you have say, a hundred transactions or less in a given month. And if you don’t have assets like inventory or fixed assets that you need to be tracking on a balance sheet.
And if you don’t have debt, you also need to be tracking on a balance sheet because what I’m gonna show you here today is just a profit and loss statement.
And if you are, let’s say an LLC, or you are a sole proprietor and you file a Schedule C, then this is gonna be all you need for tax purposes.
But if you’re a corporation, you might need a balance sheet, in which case you might need to consider accounting software instead, which I’ll talk about at the end of this video.
Downloading Banking Transactions for Record Keeping
So step one of this process before we get started in our spreadsheet is to download all of our banking transactions. That’s usually going to be the best way to do this.
Most banks will allow you to download into a CSV file, which puts it all directly into a spreadsheet, and that’s what we’re gonna use to input into our profit and loss statement, to create something a little bit more useful than just a laundry list of expenses.
So this process is gonna be a lot easier if you are using a business bank account to run all of your business transactions through that way. You don’t have to worry about downloading all your transactions and figuring out what’s personal and what’s business.
So I highly recommend doing that. It’s just gonna make life a lot easier.
But in this case, I use Relay for my business banking, so that’s where I’m gonna go first to download my transactions, which I can do under accounts and statements.
One nice thing that not every bank does, but Relay does do, is that I can actually go ahead and check multiple different months, and I can export them all at once.
I can go back to the beginning of this year and I can actually click export and I can download those statements. And when I do that, it’s gonna give me the choice between P-D-F-C-S-V and OFX.
I have no idea what an OFX report is, but what I really need is A CSV that’s gonna put it into a spreadsheet format for me, and then I’m gonna pick the account that I want to use.
So in this case, I’m gonna do my business checking.
Turning Transactions Into Financial Reports
So after downloading all my statements, I went ahead and opened the January statement, and this is an example of what that can look like. So yours might be a little bit different. The columns might be set up a little bit differently based on how your bank does it.
However, it should have some of the same columns, maybe just in a different order. And thankfully, we’re really only gonna need a couple of the columns in here. So the ones that matter are going to be the date column, the payee column and then also the amount column.
That’s really all you need to be able to put this into an easier to understand format that actually looks like a profit and loss statement.
Creating a Profit and Loss Statement From Transactions
So the next step in this process is gonna be to take these transactions and put them into the form of a profit and loss statement, which is what your tax preparer is going to want to see.
And, and not only that, a p and l also makes it a lot easier to see what’s actually going on in your business and how much money you’re making.
Now I’m gonna walk you through this in my profit and loss template.
Many of you probably already have this, so you can go ahead and follow along. But if you don’t have one of these templates yet, go to jamie trell.com/profit loss where you can purchase one.
Or if you are comfortable creating one yourself, I actually made a video that walks you through how to make a profit and loss statement in Excel or Google Sheets. So if you’re a DIYer, then go ahead and watch that video and you can create one yourself.
But if you’d rather save the time, then go ahead and grab my template again at jamietrull.com/profitloss. And that’s what I’m gonna walk through here today.
Using a Spreadsheet Template for Business Financial Reports
So now we’re within this p and l and what you can see is that it has a place on this front page where you’re gonna have income and expenses. All of this is gonna automatically populate based on what you put on each individual monthly tab.
So you can see here that you will have a monthly p and l once you’re done with this, and you’ll be able to see your full year to date p and l.
My template also comes with some really cool dashboards that I’ll show you in a little bit in. You can even do cash reconciliations with this to make sure that you have captured all the transactions that you need to capture and that your cash balances are reconciling out.
So now that you’ve downloaded those bank statements and you have those transactions in a CSV file, you’re gonna go to the very first month that you’re starting with. In this case, let’s start with January, and that’s where you can actually put this information.
Now, yes, you can just key it all in, but that seems like it would take way too long. So I’m a big fan of just copying and pasting, although what I do suggest is to copy and paste one column at a time.
Copying Transactions Into the Bookkeeping Spreadsheet
So what you can see is I’ve already gone ahead and pulled up the January tab in the PL template. I also have my January statement items that came from my bank account.
And what I’m gonna do is just copy and paste, and I recommend actually doing this one column at a time. So I’m gonna take the date column first, and I’m just gonna go over here and I’m gonna paste it.
And actually what you probably want to do is paste special values because that’s going to make it so that it doesn’t mess with the formatting and it’s gonna move all of those over.
Now we gotta do the descriptions so you can decide what you put in the description. I actually like to put more of the payee there, but if you want more of a description, you can put that there. It’s completely up to you.
But I’m gonna go ahead and do the same thing and pay special into the description. And then the amount, remember was from over here on this column. And you’re gonna see that you can just copy paste directly over here.
And again, we’re gonna paste special values. You can do this in either Google Sheets or Excel. It will work in both.
Checking Transaction Signs and Categorizing Expenses
So now these transactions have all been put in here on the January tab, and that took all of about 30 seconds. But that isn’t all that we need to do.
So we have the transactions. Now in the template, the first thing I want you to do is to check the signs. So you’ll notice up here on each tab, it will tell you what sign it should be.
So in this case, incoming money should be positive, outgoing money should be negative. So just make sure that that’s how your bank also shows this, right?
So I can tell that yes. Stripe is incoming money, so that should be positive. It is. All these negatives are expenses, so that’s correct.
Now, if you are doing this with either your bank statements or again, you would do the same thing with credit card statements, right? So if you are taking transactions from your credit card, it’s gonna come in the same way.
Different banks and different credit cards will show these numbers differently. So if for some reason maybe your bank just defaults to everything being positive, you might have to go in and manually add those minus signs if that’s the case.
It’s unfortunate and it does add some extra manual work, but hopefully like mine, your bank statement or your credit card statement comes in with incoming money as positive and outgoing money as negative or expenses as negative.
Categorizing Expenses for Better Financial Reports
So once you’ve checked that, it’s time to actually categorize these.
This is what makes it from a laundry list of expenses into something that is actually organized in a way that you can really understand what it’s saying to you and is organized more closely to what they’re going to need for tax purposes.
So you’re really just sub totalling your expenses in a way that makes sense. And you do that by choosing categories from the dropdown menus.
So you’ll notice there’s already several that are populated in here. If you have my spreadsheet or you can actually make changes to this if you’d like to.
That’s on the chart of accounts tab.
So here on the chart of accounts tab, you can add in whatever you want for those categories to be. You can change, especially anything that is in yellow can be changed or customized.
So if there’s a specific type of account that you want to be tracking and it is not showing up, then you can add it here on this page.
And also on this chart of accounts page, you can put in the different accounts that this came from. So for example, I can put relay checking account here.
And then if I’m also bringing in, let’s say, my Chase credit card, chase credit card account, that’s gonna help me when it comes to reconciling my accounts.
And I recommend you do this actually before you start categorizing. Because sometimes you can have issues if you start categorizing and then change some of these titles, it’s gonna get confusing.
So definitely take a look at the chart of accounts section and make sure it has everything that you need and make any modifications that you need to before you start categorizing on the monthly tabs.
Reviewing Monthly Profit and Loss Reports
So now let me show you how we do this. So we go into this.
Now, first of all, we can go to the account. Remember I put Relay or Chase. These are all gonna be Relay and because I like to do things faster, and because these are all from Relay, I’m just gonna carry this down. So it’ll put in relay checking account for all of them.
Now here is gonna take a little bit more time. This is probably where most of your time is gonna end up, and that’s categorizing each of these expenses.
So we’re gonna jump in and we’re gonna say exactly what all of these things are.
So I just finished categorizing that took me about a minute and a half or so for about 20 transactions. So again, depending on how many transactions you have, is gonna pretty much dictate how long it’s going to take you.
But I’m already done with January, so that’s my whole January p and l.
And now I can go and actually look at what my p and l looks like for January, so I can see that it is summarizing each account separately. And I can see where my money is going really easily.
Again, it’s going to summarize anything that we categorized into those specific accounts, and it’s gonna tell me what my profit and loss was for January.
And then of course I can do the exact same thing for each and every month going forward.
Handling Personal Expenses and Additional Transactions
So I can fill in February next. And again, it’s gonna get quicker and quicker each and every time you do it, and you might be able to get it down to taking only about five or 10 minutes per month of bookkeeping.
And also, if you have anything that is personal in nature that maybe you paid out of your personal account, but you want to deduct for tax purposes, you can actually just add that in as a separate transaction.
You can key in any additional transactions that you want to. In that case, you’re probably going to want to in your account section go into your chart of accounts.
And just say personal bank account, and then you can select that when you are selecting which account it came out of, just so that you know that you don’t need to reconcile those in your cash reconciliation.
Using Cash Reconciliation to Check Record Keeping
And the cash reconciliation works really easily too in this spreadsheet where essentially you’re just gonna put in what your beginning balance in cash was at the beginning of the year.
Let’s say it was $5,000.
And then you’re gonna be able to put in your ending cash balance per your bank statement, and you can compare.
So if I put in, let’s say, my ending bank state was actually $9,000. Well, all of a sudden I’m off by $325.
So maybe I’m missing some transactions that should have been posted and they’re not coming through for some reason.
Or I’ve deleted something or double counted something. So this is a good sense check for cash reconciliation to make sure that you’ve included all the transactions that actually hit through that bank statement.
Reviewing Full-Year Financial Reports
So I’ve gone through and put all of those expenses from my bank statements and credit cards into each individual monthly tab and made sure the signs were correct, and I can see everything now pulling in.
So I can see all of my income. I had two categories that I was putting my income into, although you can use several different ones if you’d like to.
And also, my expenses have been categorized down here based on what I put in, and then it is telling me what my operating income was, my profit essentially for each and every month.
And then over here I can see my full year to date.
Again, your tax preparer will love you if this is what you hand them, or if you’re doing your taxes yourself. You will easily be able to utilize this to put this directly into your Schedule C for your taxes.
Using Dashboards to Understand Business Finances
And the cool thing also about this template, if you choose to snag the one I’ve already created for you, I’ve added some really cool dashboards because who doesn’t love some charts and graphs?
I’m a bit of a nerd when it comes to this stuff.
So you can actually see your revenues split out by month. You can see your operating expenses by month to see which months have been the most expensive.
And then you can check out your revenue by category.
So again, if you have multiple categories, that can be really helpful and you can even see your top five expenses year to date.
You can see a graph of your profit and loss by month and your profit by quarter to see very clearly Q4 was definitely the best quarter of the year.
Creating a Monthly System to Stay Caught Up
So I hope you can see how easy it is to use and it does not have to take your entire weekend or weeks for you to catch up on your bookkeeping, even if you haven’t been so diligent yet this year.
Now remember how I said that I would tell you how I stay caught up.
Well, my secret is my money Monday.
So every Monday I sit down and do all of my various different money tasks.
So if you want to see a behind the scenes into what a money Monday looks like for me and what I actually do to keep up with my finances and make sure that I’m staying profitable, check out this video next.
When to Upgrade From Spreadsheets to Bookkeeping Software
Now, as much of a spreadsheet lever as I am, it is actually my love language by the way.
I also know that sometimes we have to go ahead and upgrade and move past spreadsheets at a point in time.
So as your business is getting more complex or you become a corporation or you need to track a lot more transactions, that might be time to go ahead and get set up on a bookkeeping software.
I personally use cloud-based bookkeeping software because it actually automatically brings in all those transactions from my various different bank accounts and credit cards, and I can categorize everything right there.
And it has ai, which saves me time when categorizing various things or I can set up rules to do those things in the software.
So once you’ve caught up this year and used this p and l template, it might be time to go ahead and get set up starting next year on a more complete accounting system.
So if you wanna know what accounting systems I recommend and get some good deals on them, make sure to go to jamie troll.com/accounting and check out this video next.
Thanks for joining me and I’ll see you next time.


