
There are a lot of great reasons to switch from QuickBooks to Xero
- Switch from Quickbooks to Xero and you’ll find subscription costs are nearly 50% less.
- Get access to powerful tools like Hubdoc (for storing and organizing receipts)
- Syft Analytics (for advanced reporting) included at no additional costs.
Moving accounting systems is a critical business decision that demands accuracy, not guesswork.
This guide provides the definitive, step-by-step roadmap for successfully migrating your financial data from QuickBooks Online to Xero, ensuring data integrity and a smooth transition.
This process is about more than just saving money—it’s about setting up your business for smarter financial management.
Why Xero is the Modern Choice for Your Business
Xero isn’t just an alternative; it’s a platform built for collaborative, cloud-first financial management.
- Real-Time Collaboration: Unlimited users and cloud access mean your bookkeeper and team can work together anytime, anywhere.
- Best-in-Class Integrations: Seamlessly connect with over 1,000 apps (payroll, POS, inventory) for a truly customized, automated system.
- Improved Efficiency: Powerful features like Hubdoc (receipt management) and Syft Analytics (advanced reporting) are often included, streamlining your workflow.
Best of all, Xero offers a user-friendly interface designed to make financial management accessible without an accounting degree.
Plus Xero allows accountants and bookkeepers able to complete those more difficult tasks.
Guest Post by Laura Pilkington, Founder & CEO, Accounting Elements
At Accounting Elements, we help business owners transition from QuickBooks Online to Xero every day.
Here’s our step by step guide to a successful conversion process
Pre-Conversion Checklist For Your Quickbooks Data
Before we can consider moving to Xero, we have to get our QuickBooks Online file ready for conversion.
As they say, “garbage in, garbage out.”
Preparing your datafile in QuickBooks Online first will give your conversion the best possible outcome.
1. Reconcile Your Accounts
- Reconciling all bank and credit card accounts to the most recent statements.
- Confirm balances match exactly.
2. Review Accounts Receivable and Accounts Payable
- Apply any credit notes where possible.
- Merge multiple A/R and A/P accounts.
- Ensure that the account type for each of these is accurate.
- Ensure A/R and A/P balances from detail reports match the balances shown on the balance sheet.
(Pro-Tip: In Xero, you’ll never have to worry about these balances not matching again!)
3. Clear Out Clearing Accounts
- Reconcile clearing accounts to zero, especially Undeposited Funds.
- Ensure Undeposited Funds is set up as an Other Asset/Undeposited Funds (or contact history may be lost in Xero!)
4. Confirm Inventory & Sales Tax
- Verify inventory counts and values are accurate.
- Check sales tax rates, ensure balances are correct and that returns have been filed.

5. Clean Up Your Chart of Accounts
- Remove duplicates and merge unnecessary accounts
- Keep the total number of accounts at less than 699 for optimal speed and efficiency
- Xero requires a flat chart of accounts, so remove any parent accounts
- Switch chart of accounts numbering on and number your accounts without any special characters.
(Want a copy of our standard chart of accounts? Reach out and we’re happy to share it with you!)
6. Handle Payroll Separately
- QBO Payroll will not convert.
- We recommend Gusto, though there are many payroll systems that will integrate smoothly with Xero.
- Export YTD payroll history from QBO, then work with your new payroll provider to enter it into the new system.
7. Items That Won’t Convert
- QBO Self-Employed
- Multicurrency data
- Advanced (tracked) inventory
- Locations
- Projects
- PDF Attachments
- Linked Transactions
Get the Best Deal on Xero (Updated September 2025!)
If you’ve searched the web looking for the best, most up to date deal on Xero: here’s everything you need to know about switching from Quickbooks Online.
Get the best partner discount (6 months of Xero for 90% off!)
Xero Conversion Options
Once your file is prepped, there are three ways to move from QuickBooks Online to Xero.
Regardless of which way you choose, we recommend first signing up for a shell Xero account using our partner link to get the best deal (currently 90% off for 6 months, but subject to change).
The rest of this article will walk through Option 1, which is the preferred method to use if you want full transaction-level historical detail in your Xero file. – Jamie Trull
1. JetConvert (Recommended)
- Xero’s official migration partner.
- Xero subsidizes the cost – covering the current year and one prior year of transactional data.
- Additional years can be added for a small fee.
- Easiest, most affordable option.
2. Fresh Start Conversion
- Enter the balances from your most recently filed tax return.
- Ideal if your QBO file is messy or detailed history isn’t needed.
3. Xero Conversion Toolbox
- Best suited for a Xero advisor to import multiple CSV files into Xero.
- Useful for complex files that JetConvert can’t handle.
- Preserves transactional detail.
Still Using QuickBooks Desktop? (You’ll love the Xero alternatives and comparative features!)
We recommend moving your file into a free QBO trial, then following the migration steps below.
From Hero to Xero Accounting Software and Financial Management!
Note: Jamie recommends setting up a shell account first using our Xero link in order to get the best rate on Xero, rather than having JetConvert set up the account directly.
Here’s how to get started with JetConvert (see screen-by-screen tutorial)

1. Navigate to your QBO Portal.
Add JetConvert as a Company Admin user with the following credentials:
- Name = Jet Convert
- Email = qbo@jetconvert.com
- Access = Company Admin
2. Navigate to Jet Convert’s website to start your Xero Conversion.
Choose “Click Here to Start Your Xero Conversion” in the top right hand corner.
3. Choose whether JetConvert will create a new organization for you or use an existing shell file.
- a. New File: JetConvert creates your Xero Organization transferred to you
- b. Existing Shell File: For Existing Organisations, please select here.
4. Read through JetConvert’s Pre-Conversion Checklist.
Follow the recommended data prep steps to be sure everything has been completed.
5. Disconnect bank feeds in QuickBooks Online.
Save reports that you may need later, such as:
- Balance Sheet by year for at least 7 years (and/or one for all ;me)
- Income Statement by year for at least 7 years (and/or one for all ;me)
- Trial Balance year over year for 7 years (and/or one for all ;me)
- General Ledger with all columns selected for all dates
- All open invoices (with coding showing)
- All open bills (with coding showing)
- Any other custom report you think you may need – inventory, sales tax, etc.
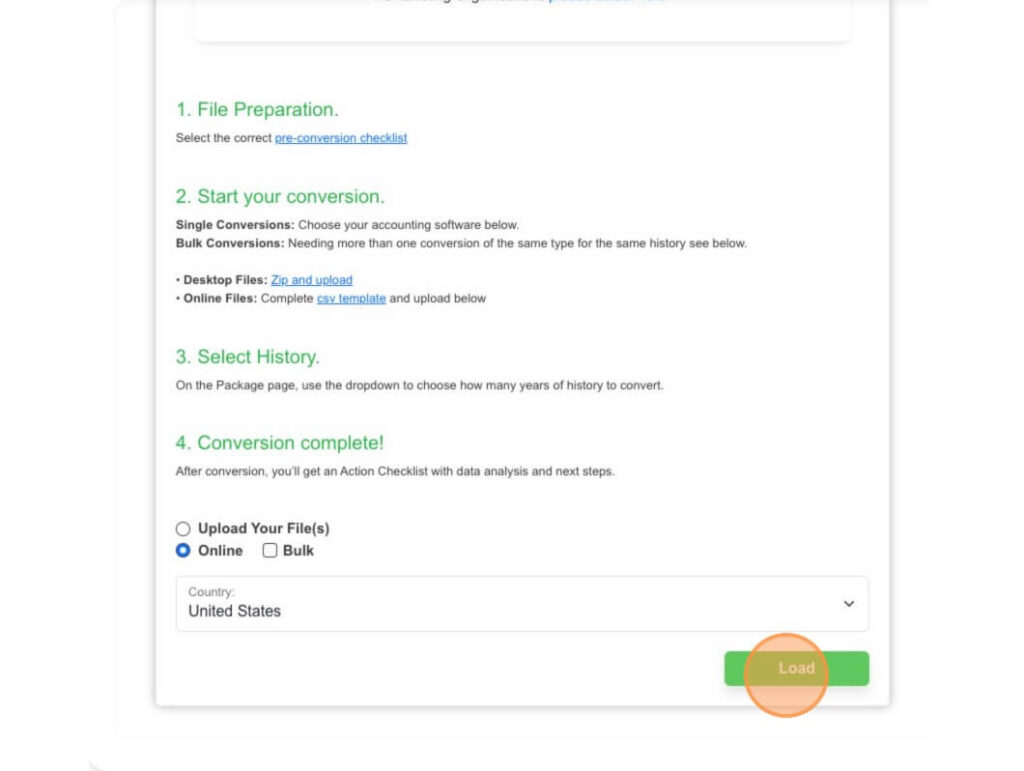
6. Head back to the JetConvert page and skip to the bottom of the checklist screen.
- Choose Online, United States, and load your file.
- Click the green Load button.
7. Complete the contact information related to your data file.
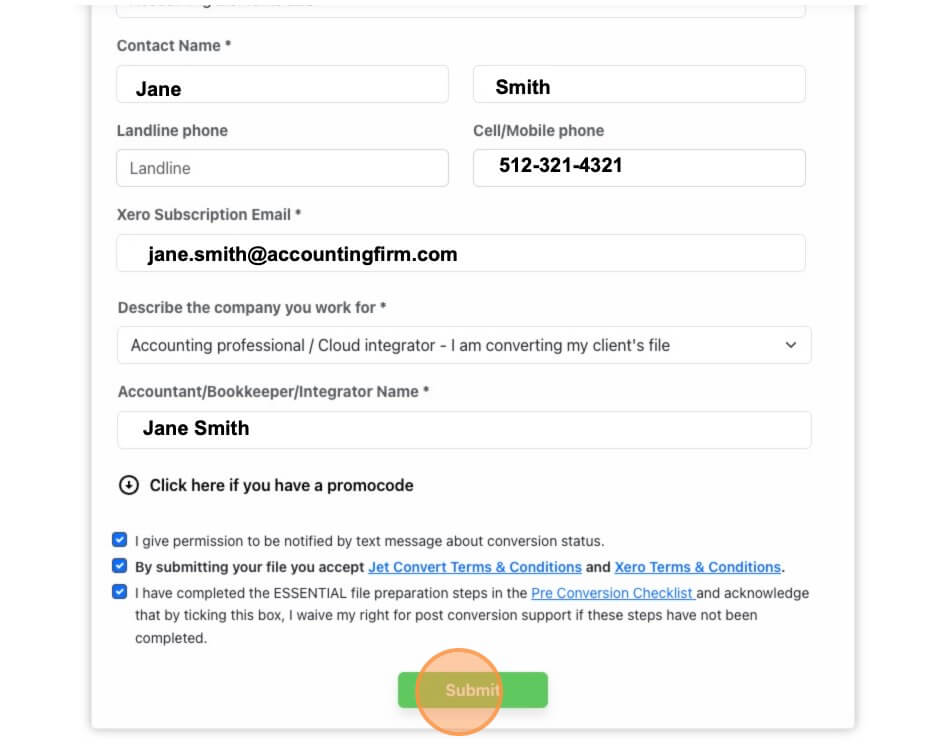
- Add any additional promo codes, then click Submit.
- Make note of the Conversion ID Number.
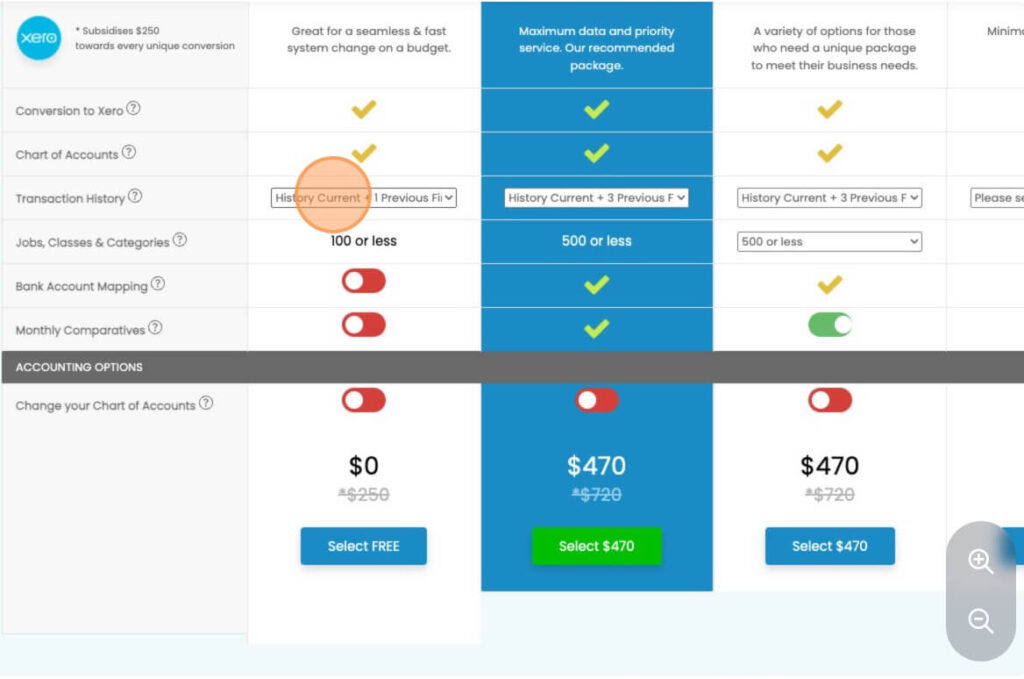
8. Select your conversion package corresponding to how much historical data you’d like to migrate.
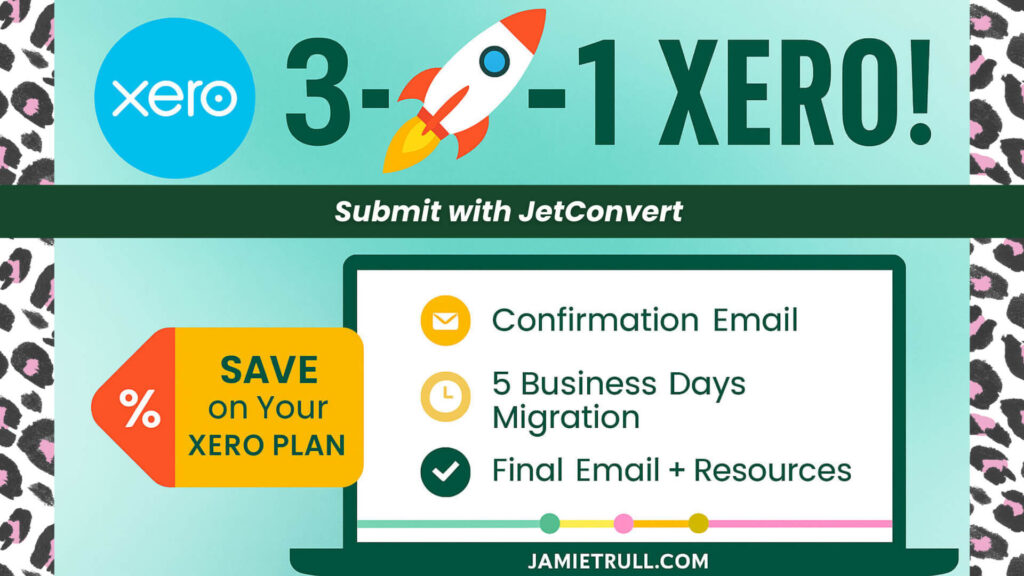
3 – 2 – 1 Xero!
Once you click submit, JetConvert handles the rest!
You’ll then receive:
- A confirmation email with a link to track progress
- Migration completion within five (5) business days.
- A final email with post-conversion steps and resources.
View my screen-by-screen walkthrough of JetConvert Post Conversion Steps.
What’s Next After Converting From Quickbooks?
After conversion, you’ll need to complete a few steps:
- Verify your migrated data by comparing the same reports to the ones you saved from QBO.
- Reconnect bank feeds.
- Adjust settings and customize your Xero dashboard.
- Sign up for payment options like Stripe for credit cards, ACH, or even Klarna so that you get paid quickly.
We’ll be covering these post-conversion steps in our next blog, so stay tuned!
Xero Pricing Plans at a Glance (Updated September 2025)
| Plan | Regular Price | With 90% Off | 6-Month Savings | Key Features |
|---|---|---|---|---|
| Early | $20/mo | $2/mo | Save $108 | Send invoices, reconcile bank transactions |
| Growing | $47/mo | $4.70/mo | Save $254 | Bills, quotes, multi-currency support |
| Established | $80/mo | $8/mo | Save $421 | Payroll add-ons, advanced features |

How to Redeem My Xero Deal
- Click my partner link: Get 90% Off Xero
- Choose your plan (Starter, Standard, or Premium).
- Create your account → discount auto-applies.
- Pay as little as $2/month for your first six months.
💡 Pro tip: Combine the 30-day free trial with this discount to maximize savings.
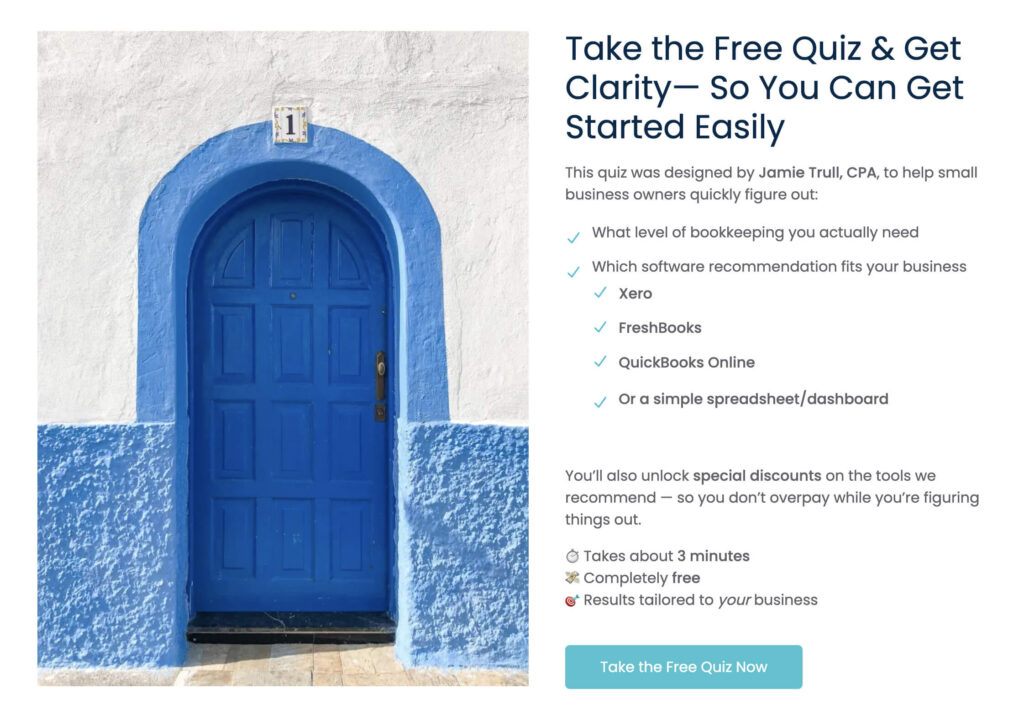
Stop Guessing: Which Accounting Tool is Actually Right for You? Take the Quiz to Find Out!
❓ Frequently Asked Questions (FAQs Updated 2026)
Getting Started
- How to get Xero for free? → Xero offers a 30-day free trial. Some partners offer extended discounts.
- What is the cheapest version of Xero? → The Starter plan at $15/mo ($7.50 with discount).
- Does Xero offer a free trial? → Yes, 30 days.
Using Discounts
- Can I use multiple Xero promo codes? → No, only one code per account.
- Can I combine the free trial with a promo code? → Yes! Start with the trial, then activate your discount.
- Are discounts only for new customers? → Yes, current promos are for new signups only.
Features & Support
- Does Xero do point of sale (POS)? → Not directly. You can connect POS apps via Xero’s App Store.
- Can I use Xero for multiple companies? → Yes, but each company requires its own subscription.
- Is my data safe? → Absolutely. Xero uses bank-level security and encryption.

Save Time & Simplify! More Xero Insights from JamieTrull.com:
A Quick Note From Jamie Trull:

Get the best deal on Xero With Our Promo Code!
Use our Xero promo code to get the best deal on Xero accounting software!
As cloud based accounting software options grow, Xero has emerged as a strong alternative to Quickbooks Online.
Use our exclusive Xero promo code to get the BEST deal on Xero!
This post may contain affiliate links, which means I may earn a small commission if you make a purchase through these links at no additional cost to you (in fact, using our links can typically SAVE you money).
We appreciate you supporting our small business by using our links!


