

If you are you struggling to break down your business finances in a way that actually helps you make smart decisions, Xero accounting software may have your solution.
You’re not alone—and with QuickBooks discontinuing their tag functionality, many small business owners are looking for a software to fit their needs.
If you’ve been frustrated with limited data segmentation or outgrown what QuickBooks offers, it’s time to explore a powerful alternative: Tracking Categories in Xero.
In this ultimate Xero tutorial for 2026, we’ll break down how to use tracking categories in Xero, why it’s the best way to track income and expenses by product, location, or service.
Plus, how to streamline your bookkeeping like a pro—even if you’re just starting out.
Unlock Special Discounts on the Top Accounting Tools. 👇
Why Small Business Owners Need Better Financial Segmentation
If you’re a small business owner, you know that accurate and insightful financial reporting is critical.
But generic reports aren’t enough. You need to understand where your money is coming from, and just as importantly, where it’s going.
The Problem with QuickBooks Tags (and Why Users Are Frustrated)
Many entrepreneurs have been using QuickBooks tags to segment their financial data by revenue stream, product, or location.
But with QuickBooks phasing out tags, users are scrambling to find another way to track income and expenses with the level of detail their business demands.
Meet Your New Favorite Feature: Xero Tracking Categories
One of the standout features in Xero for small business owners is its built-in tracking categories, which are available across all Xero subscription levels—yes, even the most basic plan!
What Are Tracking Categories in Xero?
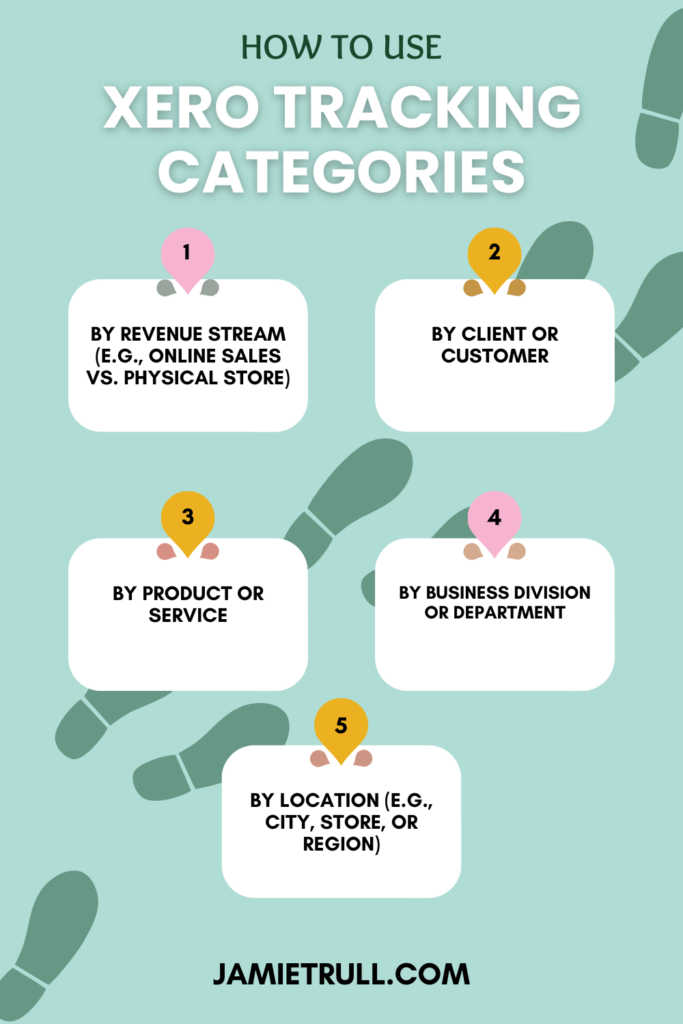
Tracking categories allow you to segment your income and expenses into multiple views such as:
- By revenue stream (e.g., online sales vs. physical store)
- By client or customer
- By product or service
- By business division or department
- By location (e.g., city, store, or region)
Think of them like upgraded, dynamic tags—but better, more structured, and more powerful.
How to Use Tracking Categories in Xero: Step-by-Step Tutorial
Step 1: Set Up Your Tracking Categories
As soon as you sign up for Xero, the first thing you should do (after connecting your bank accounts) is to set up your tracking categories.
This proactive approach will save you hours later and ensure your reports are accurate from day one.
You get two tracking categories, and each category can have up to 100 sub-categories.
For example:
- Division: Digital Products, Affiliate Marketing, Speaking Engagements
- Location: Online, Retail Store, Amazon, Shopify
Xero Pricing Plans at a Glance (Updated September 2025)
| Plan | Regular Price | With 90% Off | 6-Month Savings | Key Features |
|---|---|---|---|---|
| Starter | $20/mo | $2/mo | Save $108 | Send invoices, reconcile bank transactions |
| Standard | $47/mo | $4.70/mo | Save $254 | Bills, quotes, multi-currency support |
| Premium | $80/mo | $8/mo | Save $421 | Payroll add-ons, advanced features |
Step 2: Use Tracking Categories When Creating Invoices
When you create an invoice in Xero, you can assign each line item to a specific division and location. This means:
- You can separate digital product sales from service income
- You can track where each sale came from—online store, in-person, or third-party platform
Step 3: Reconcile Transactions with Precision
During bank reconciliation, Xero allows you to assign tracking categories to each transaction directly.
Whether it’s an office expense, payroll, or a vendor payment, you can easily allocate it to the correct division or location.
For example:
- Book editing = Assigned to “Hidden Profit Book” division
- Advertising = Assigned to “Marketing” location
This creates clean, organized books and ensures accurate reporting.
Advanced Tip: Use Xero Bank Rules to Save Time
Here’s a game-changing Xero tip: Set up bank rules!
What are Bank Rules?
Bank rules allow you to automatically apply:
- Account codes
- Descriptions
- Tracking categories
- Even split expenses between divisions
So, if you pay for something monthly (like G Suite), you can automatically assign 50% to one division and 50% to another.
No manual data entry required!

How to Set Up Bank Rules in Xero
- During reconciliation, click “Options > Create Bank Rule.”
- Add logic like “Description contains G Suite.”
- Assign the transaction to the correct contact.
- Split the transaction across multiple divisions or categories.
- Save and apply rule.
This feature alone can save you hours every month and make your financial reporting in Xero more accurate and actionable.
Real-World Example: Profit and Loss Reports by Division
Once tracking categories are set up, you can generate powerful reports like:
- Profit and Loss by Product Line
- Income by Channel (Amazon vs. Shopify vs. In-Person)
- Expense Breakdown by Location
- Marketing Spend by Division
Instead of seeing one flat profit and loss report, you’ll get segmented data that helps you identify:
- Which products are most profitable
- Which locations are underperforming
- Where your marketing dollars are working hardest
This is next-level financial clarity.
Why Xero is the Best Bookkeeping Software for Small Businesses in 2026
Still wondering why so many QuickBooks users are switching to Xero?
Here’s what makes it the best QuickBooks alternative right now:

✅ Accessible Tracking Features
Unlike QuickBooks, where you need to upgrade to access class tracking, Xero provides full tracking capabilities even on its lowest tier.
✅ Seamless Reporting
Xero’s reports are easy to customize, filter, and share. Want to send a digital products-only P&L to your marketing manager?
Done.
Need to evaluate store profitability?
One click.
✅ Perfect for Data-Driven Business Owners
If you love understanding your numbers, Xero tracking categories offer the visibility you need to grow smarter.
🔄 Xero versus Alternatives
| Software | Starting Price | Best For | Deal Available? |
|---|---|---|---|
| Xero | $18/mo → $2/mo with Jamie’s deal | Small businesses, accountants | ✅ 90% off 6 months |
| QuickBooks | $35/mo | Built-in payroll | 50% off 3 mos (typical) |
| FreshBooks | $21/mo | Freelancers | 60% off 6 mos (limited) |
| Wave | Free | Very basic bookkeeping | ❌ |
👉 Xero’s 90% off 6 months deal is unmatched in 2026.
Best Ways to Use Xero Tracking Categories in Your Business
Let’s break down some practical use cases:
1. Tracking Revenue by Product or Service
Set up categories for:
- Digital Products
- 1:1 Coaching
- Affiliate Sales
- Speaking Engagements
This helps you calculate true profitability by revenue stream.
2. Understanding Marketing ROI
Want to know if your Instagram ads are working?
Tag related expenses and see how much revenue they generated.
3. Comparing Locations
Run reports by:
- In-store
- Online
- Marketplace (Etsy, Amazon)
Perfect for identifying where to double down—or cut back.
4. Internal Department Budgets
If you have different teams or departments, track their spending and revenue independently for better budgeting and accountability.
Bonus Tips: Save Time and Boost Efficiency
Here are two more powerful tips:
1. Set Up Tracking Categories Right After Migration
Don’t wait! Start using categories as soon as your bank connections are live. Retroactively tagging transactions is time-consuming and inefficient.
2. Use Bank Rules to Automate Everything
Apply tracking categories automatically based on transaction descriptions and amounts.
You can even split one transaction across multiple categories—this is a rare feature and makes Xero stand out from the competition.
Xero for Beginners 2026: Getting Started Is Easier Than You Think
If you’re worried about migrating your books to Xero—don’t be! You can watch Jamie’s full step-by-step video on how to migrate to Xero in under an hour.
It’s easy, painless, and well worth the switch.
You’ll get cleaner data, more accurate reports, and better insight into your business’s performance.
Final Thoughts: Xero Tracking Categories Are a Game Changer
If you want smarter reporting, easier organization, and a tool that evolves with your business, it’s time to switch.
Xero tracking categories are hands down the best way to:
- Track income and expenses by product
- Generate segmented profit and loss reports
- Make better decisions with clearer data
- Replace discontinued QuickBooks tags
- Automate your bookkeeping workflows
💸 Ready to switch? See my special partner discount on Xero.
✅ Today’s Best Xero Deal
Get 90% off for six months with my official Xero partner link.
This deal is exclusive, verified, and limited-time.
👉 Claim 90% Off Xero (6 Months)
(Updated September 2025. Available for new customers only.)

📝 How to Redeem the 90% Off Xero Deal
- Click my partner link: Get 90% Off Xero
- Choose your plan (Starter, Standard, or Premium).
- Create your account → discount auto-applies.
- Pay as little as $1.50/month for your first six months.
💡 Pro tip: Combine the 30-day free trial with this discount to maximize savings.
Frequently Asked Questions (FAQs)
❓ Can I use tracking categories in all Xero plans?
Yes! Unlike QuickBooks, Xero includes tracking categories in every plan, even their most affordable one.
❓ What’s the difference between tags and tracking categories?
Tags are unstructured. Tracking categories in Xero are structured and powerful, allowing for automated reporting and better control.
❓ Can I split expenses between tracking categories?
Absolutely. With bank rules, you can split one transaction across multiple divisions or locations.
❓ How many tracking categories can I have?
Xero allows you to set up two tracking categories, with up to 100 items in each category.
Ready to Get Started?
👉 See my special partner discount on Xero and save at JamieTrull.com/Xero!
🔥 Limited-time offer—don’t miss your chance to finally organize your small business finances with confidence!
Got questions? Drop them in the comments below or subscribe for more tutorials and updates on Xero for small business bookkeeping.
This post may contain affiliate links, which means I may earn a small commission if you make a purchase through these links at no additional cost to you (in fact, using our links can typically SAVE you money).
We appreciate you supporting our small business by using our links!
This transcript is a direct representation of spoken words from the original video and has not been edited for content. However, it has been formatted for readability. Please excuse any grammatical errors, repetition, or informal language, as these are natural elements of conversational speech.
Are you feeling like you can’t easily break down your finances in the way you really need to see them as the business owner? Maybe you’ve been using tags in QuickBooks Online to segment your data, but you’ve been frustrated by the fact that they’ve decided to discontinue the tag functionality.
Whether you’re trying to track different revenue streams, products, or locations, there is a better way to do it—especially if you’re interested in switching accounting software and trying out Xero.
Why I Gave Xero Accounting a Try—and What I Found
A few months ago, I decided to try out Xero. My audience has been asking for QuickBooks alternatives, so I’ve spent quite a bit of time in Xero and actually migrated my books into the software. As a data-loving person, I like to see my data segmented in the way I need as a business owner to make decisions.
After setting up my books in Xero, one of the first things I explored was their tracking categories—how they worked and how I could apply them to my business. Spoiler: I’ve been super happy with the functionality. The great thing is, tracking categories come with every single one of Xero’s plans—even the lowest one.
I’m partnering with Xero on this specific content, which means I can offer you a special deal. If you go to jamietroll.com/xero, you can sign up and get 90% off for six months right now. Make sure to use my link—it’s a better deal than what you’ll find on the Xero website.
Stick around until the end of this video, where I’ll give you my one game-changing tip when it comes to setting up tracking categories—it could save you hours.
Hi everyone! I’m Jamie Trull, your favorite CPA and financial literacy coach. I love bringing you content about the tools you need to run your business efficiently and get access to the information you need.
What Are Tracking Categories?
Tracking categories are similar to how you might use class tracking in QuickBooks Online—but class tracking is only available on the Plus plan or above. In contrast, tracking categories are available on all Xero plans, which is a huge benefit. Segmenting your data in a way that’s useful is critical to running your business effectively.
There are many ways to segment your data. Think about how you’d ideally like to see your financial data: profitability by client, location, or product, for example. Maybe you have various sales channels—Amazon, Shopify, and a physical store. You could track income and costs separately across those buckets to see what’s most profitable.
Xero allows two tracking categories with up to 100 options under each. That means you can track a wide range of information and tailor it to your specific business needs.
How to Set Up Tracking Categories in Xero
I recommend setting this up as soon as you start a Xero account—right after migrating your data and connecting your banks.
Using Tracking Categories When Invoicing:
When sending invoices, you can add multiple line items and assign each one a specific division or location. For example, a digital product might fall under your “online sales” division, and another item might be for speaking engagements and go under “other.” These assignments allow you to pull more meaningful reports.
Using Tracking Categories in Bank Reconciliation:
When reconciling your credit card or bank transactions, you can also assign tracking categories. For example, I had an editing expense for my book. I categorized it under “book expenses” and assigned the appropriate division—“Hidden Profit Book.” Even if you’re not actively using locations, you can still set it up as needed.
Viewing Reports with Tracking Categories
Once you’ve categorized transactions, you can run more detailed reports. In the profit and loss report (P&L), instead of seeing all transactions grouped together, you can filter and view by specific divisions. This makes it easier to analyze performance and share tailored reports with your team.
The totals will still align with your full P&L, but now you’re able to view it in a more meaningful and insightful way. Organizing your data well is just as important as having it be accurate—it’s what allows you to make smart business decisions.
My Favorite Tip (or Two!) to Save Time
Here are my bonus tips that will save you hours:
- Set up tracking categories immediately after migrating into Xero—before you even begin reconciling transactions.
- Use bank rules to automate categorization. You can not only assign expenses to accounts automatically, but also to specific divisions or locations. You can even split an expense across multiple tracking categories!
How to Create a Bank Rule in Xero
Here’s a real-life example: every month, I have a G Suite (Google Workspace) charge. Instead of categorizing it manually each time, I created a bank rule.
- Go to the transaction and click Options > Create Bank Rule.
- Use conditions like “Description contains G Suite” to ensure it only applies when appropriate.
- Assign contact and account (e.g., Office Supplies and Software).
- Split the expense: Maybe 50% goes to “Affiliate Partnerships” and 50% to another division.
- Make sure the total allocation adds up to 100%.
- Decide if the rule applies to one account or all accounts (recommended if you change cards often).
- Click Save, and now every time that expense comes in, it’s automatically categorized and split correctly.
This is my favorite feature in Xero. It saves so much time and ensures your reports—like your P&L and balance sheet—are more useful and accurate.
If you’re ready to try Xero, visit jamietrull.com/xero to get 90% off for six months. I also have a video showing how to migrate your books to Xero—it’s easier than you think.
This is a great opportunity to start fresh and get excited about your numbers by using tracking categories. If you have any questions, drop them in the comments—I’m happy to help.
Don’t forget to like and subscribe. I’ll be sharing more Xero content as I experiment and discover all the cool features.
See you next time!
Want more accounting recommendations for your small business?
Check out these articles:


